


Generator
History


Add a photo
Edit options
 Choose a category
Image Optimization
Image Quality & Correction
Exterior Enhancement
Interior Enhancement
Lighting, Color & Exposure
Sky Replacement
Virtual Twilight
Weather & Seasonal Editing
Holiday Decorations
Fire in Fireplace
Object & Element Specific
 Choose a enhancement
Choose category first
Looking for any specific?

 Count
Count
AI Exposure Balancing for Real Estate Photos
Even out harsh highlights and deep shadows automatically. Bring professional balance, clarity, and natural light to every listing photo in seconds.
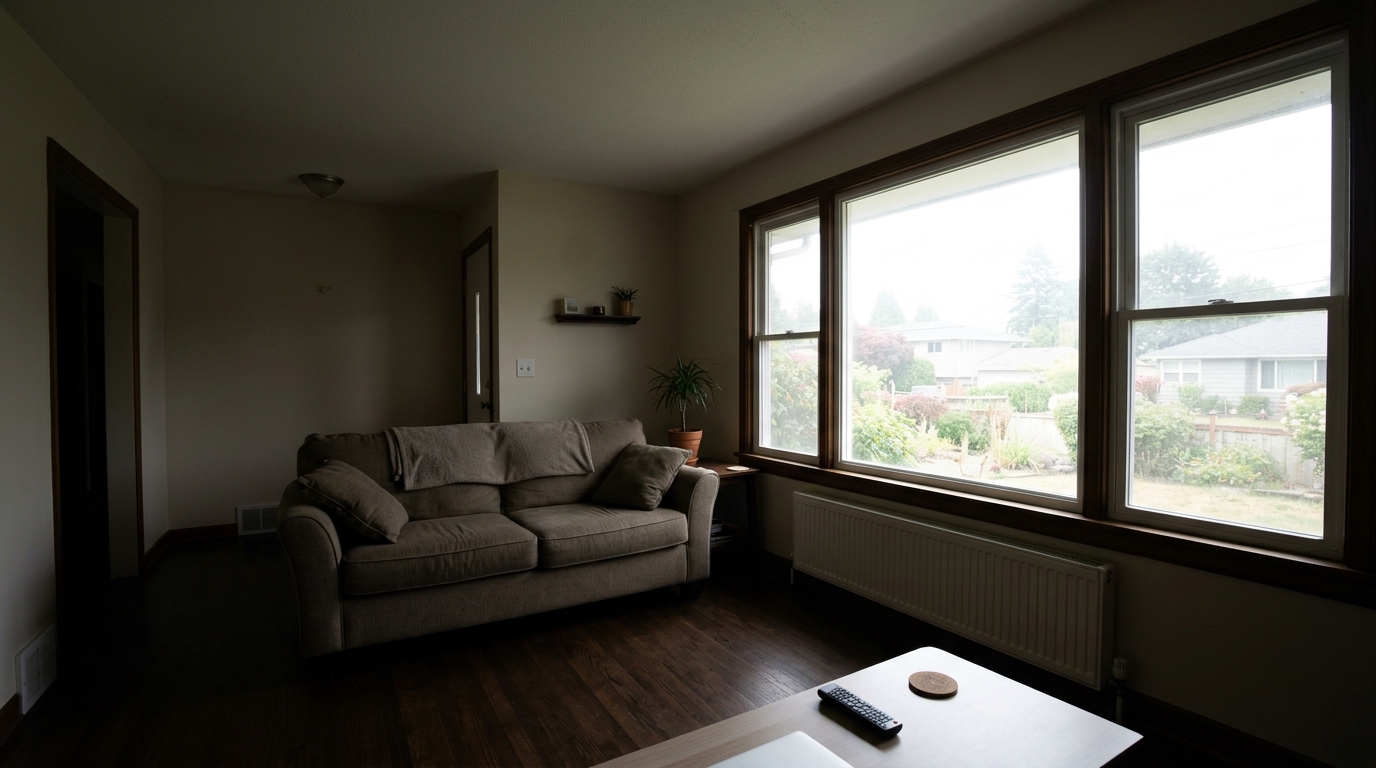
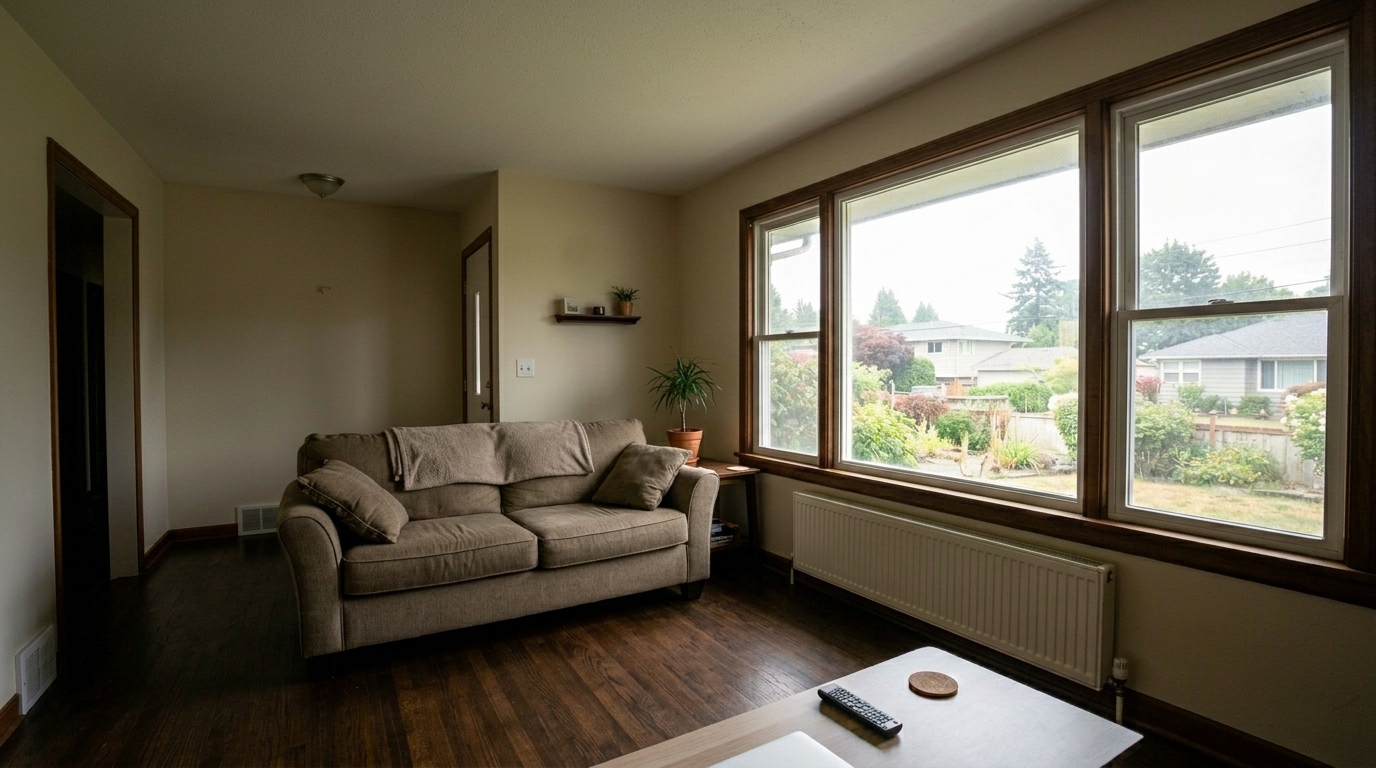 BeforeAfter
Real Estate Exposure Balancing Examples
See how balanced exposure transforms dark corners and overexposed windows into stunning views.

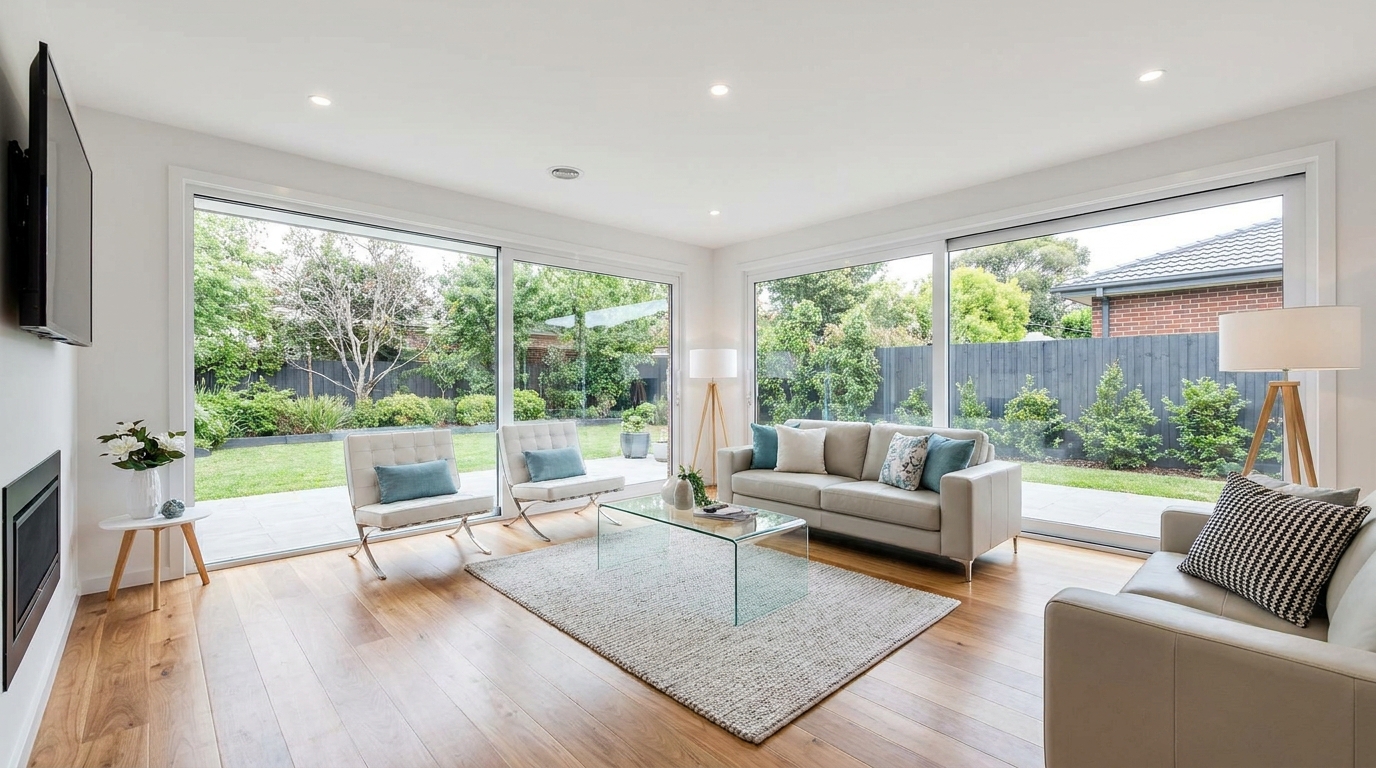
Living Room Window Pull
Balance exposure in the same living room window pull.
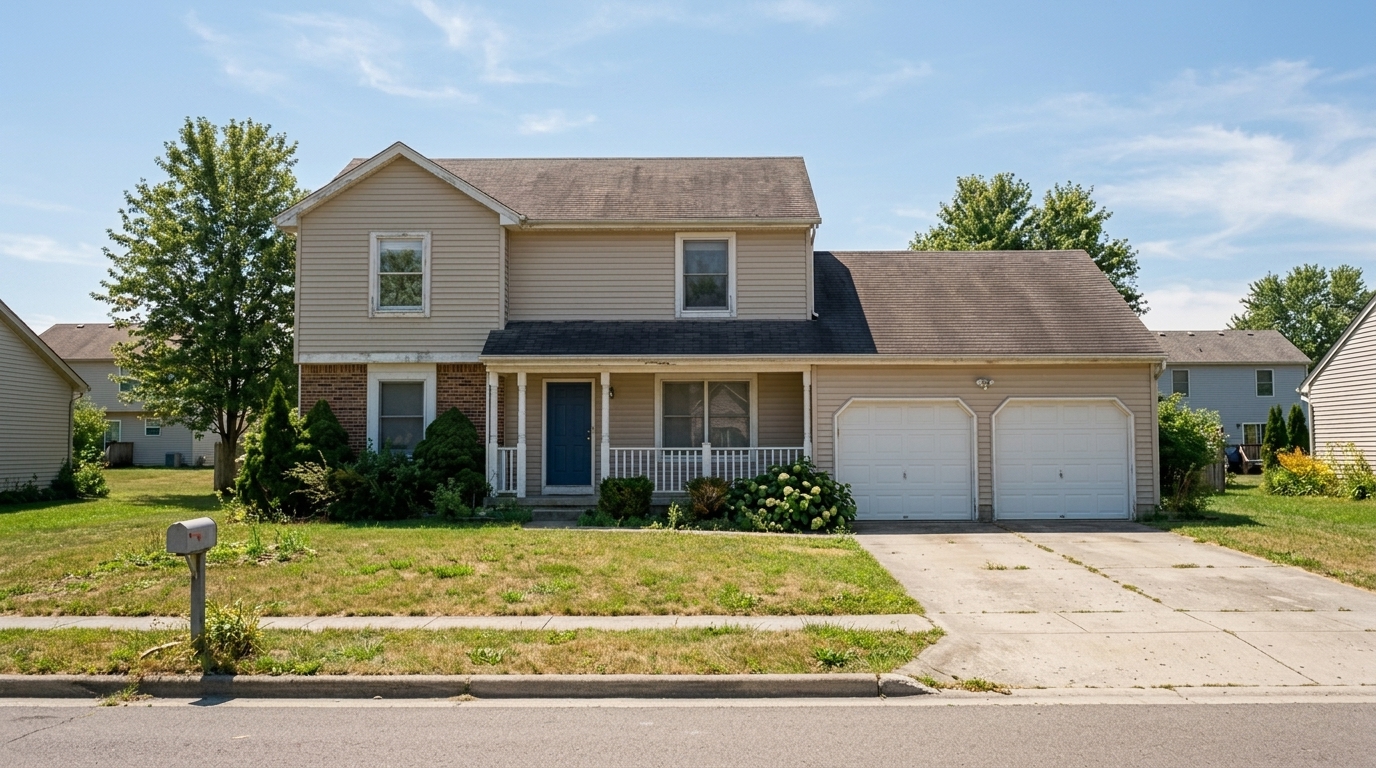
Midday Exterior Shadowing
Balance exposure in the same midday exterior shadowing.
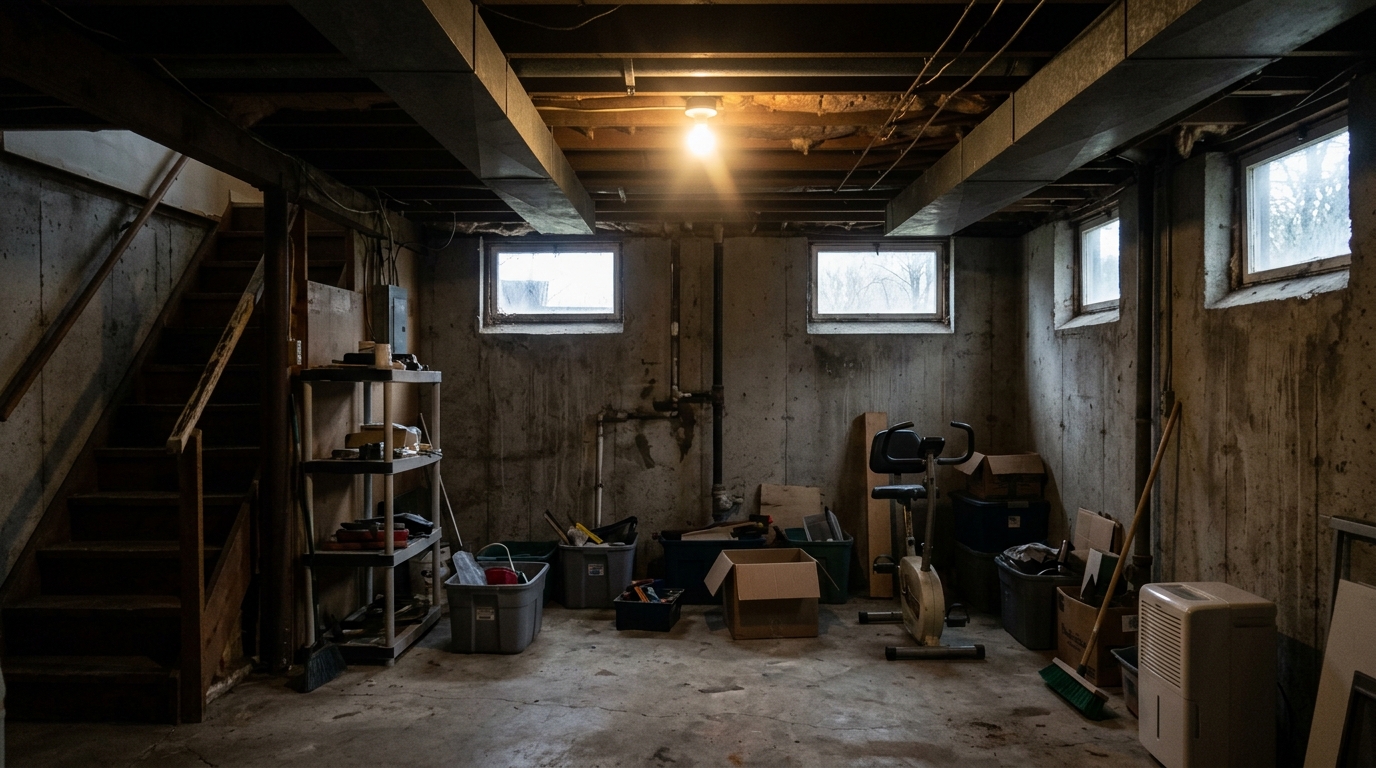
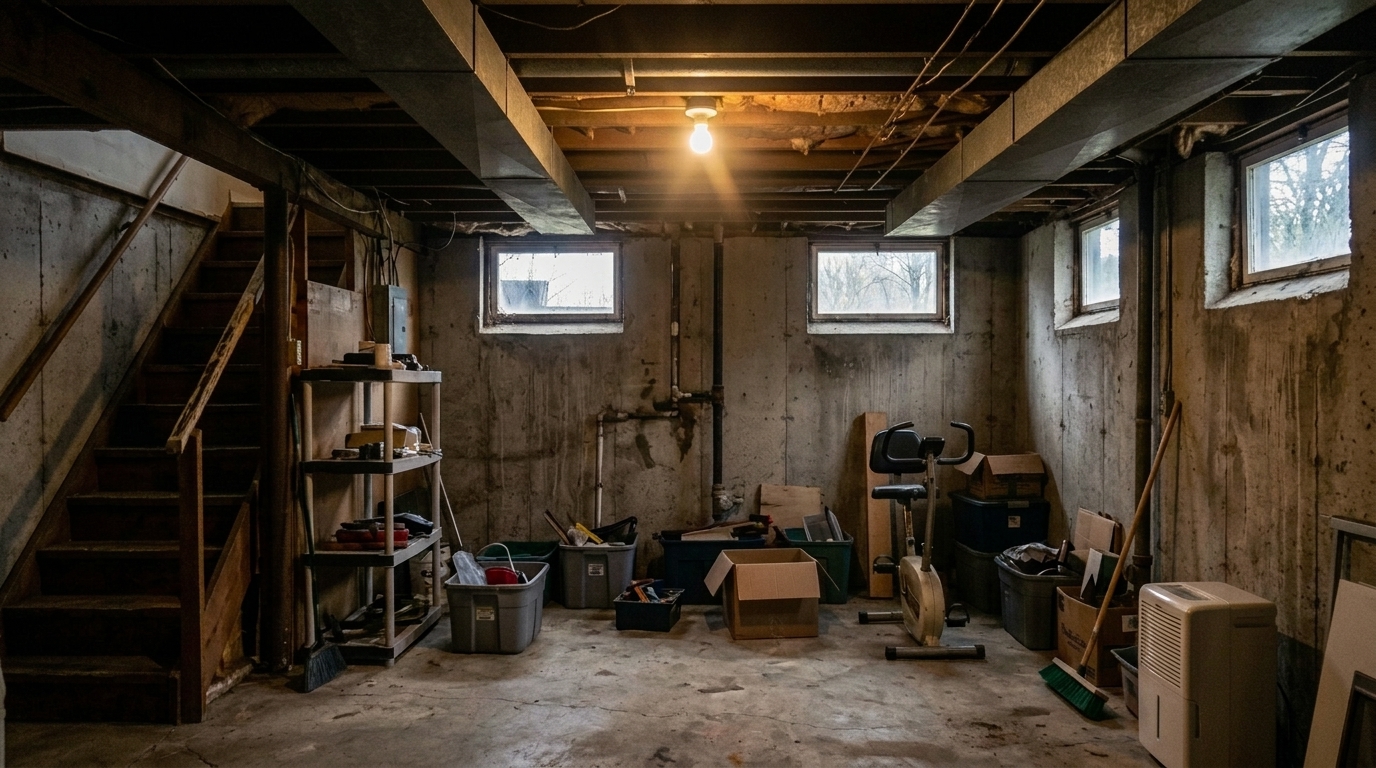
Dim Basement Family Room
Balance exposure in the same dim basement family room.
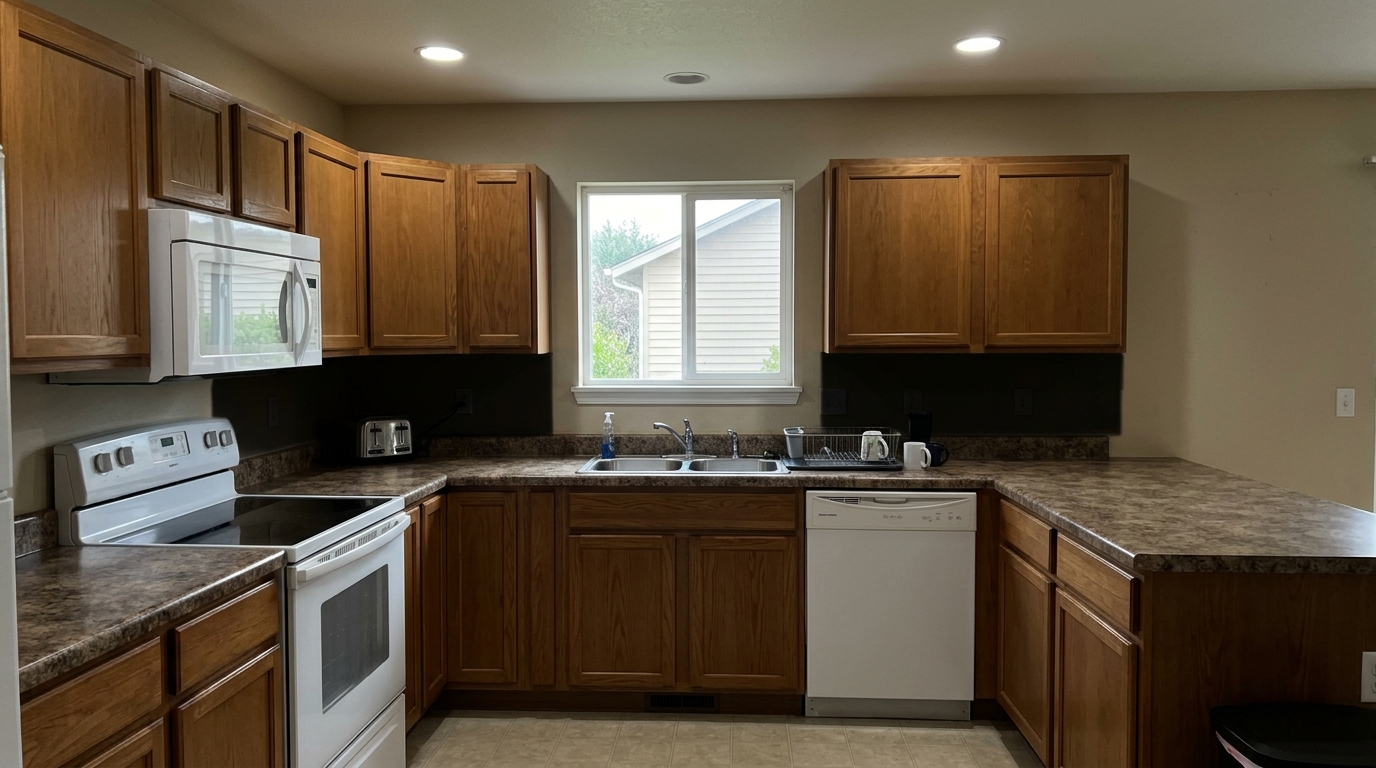
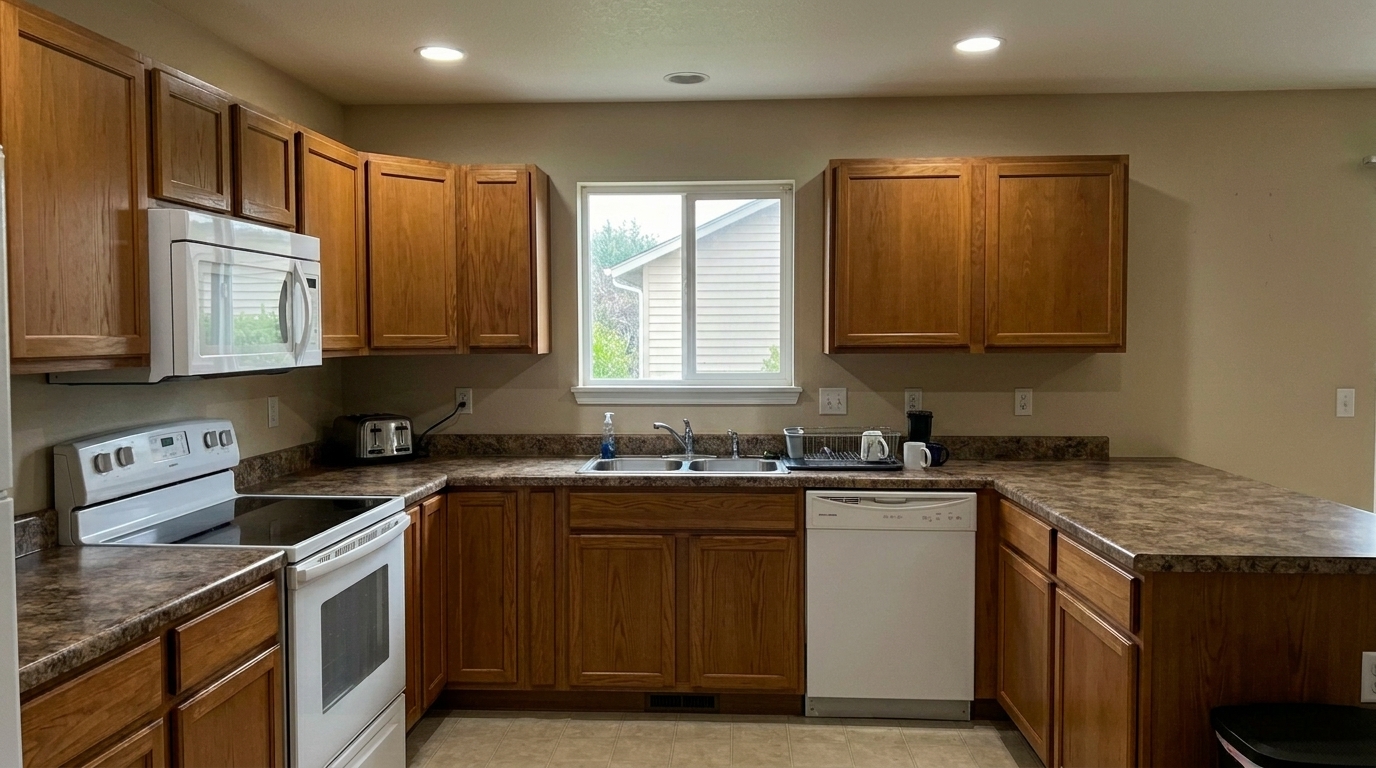
Kitchen with Under-Cabinet Shadows
Balance exposure in the same kitchen with under-cabinet shadows.
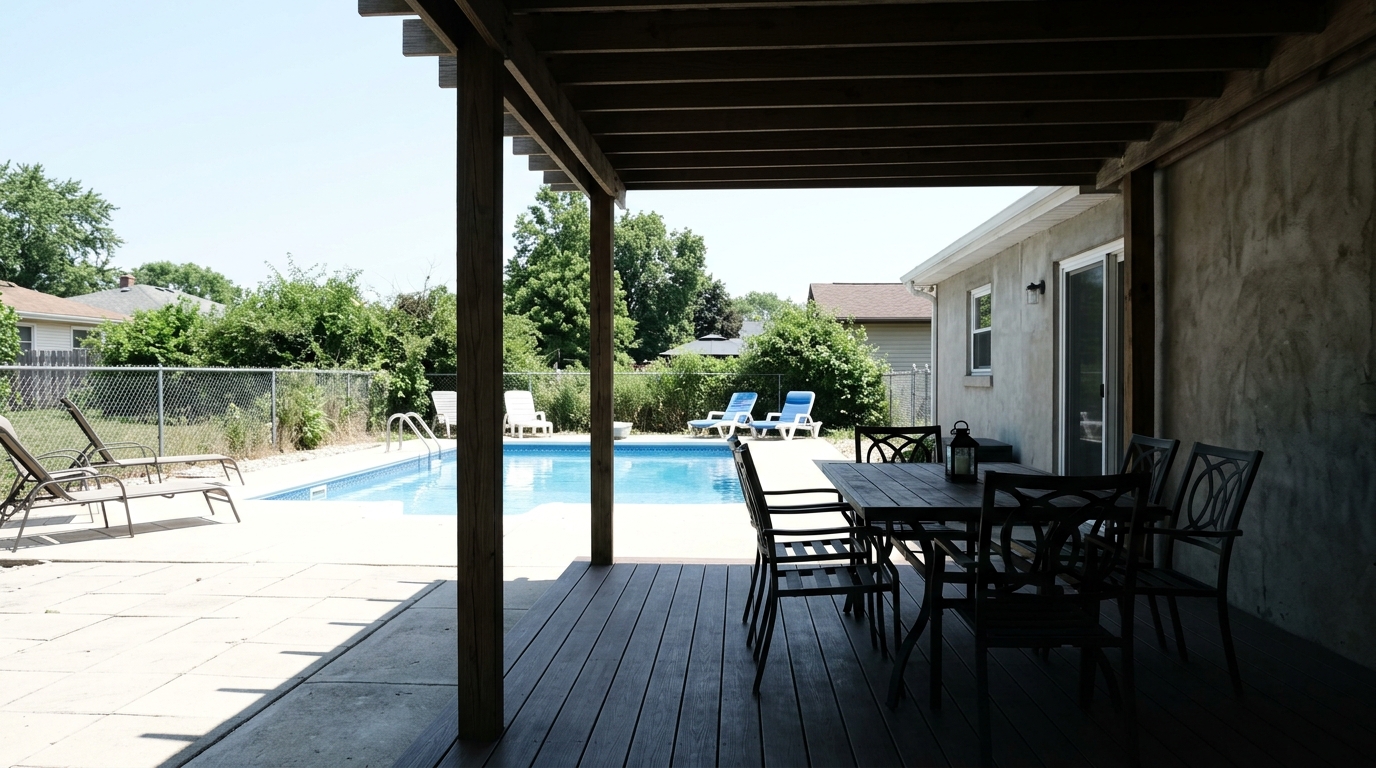
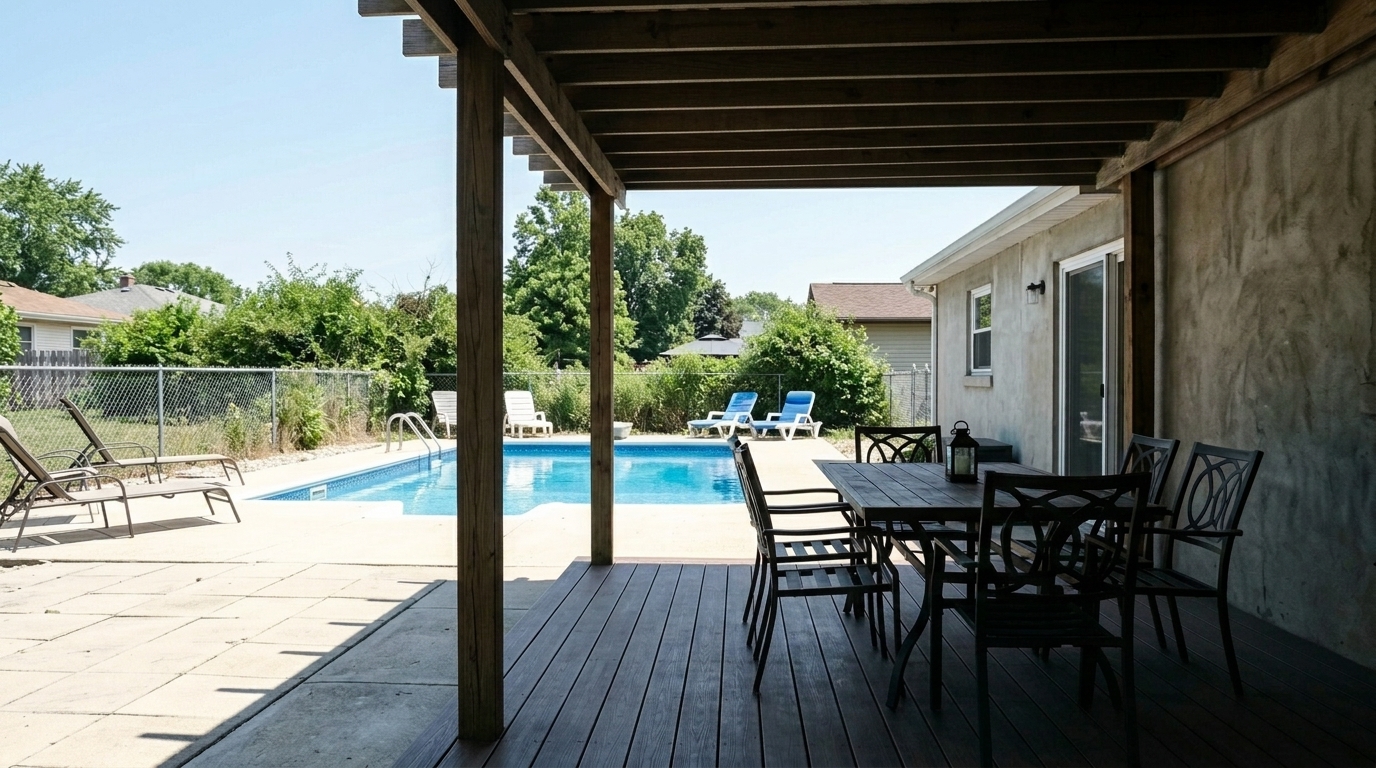
Covered Patio Contrast
Balance exposure in the same covered patio contrast.
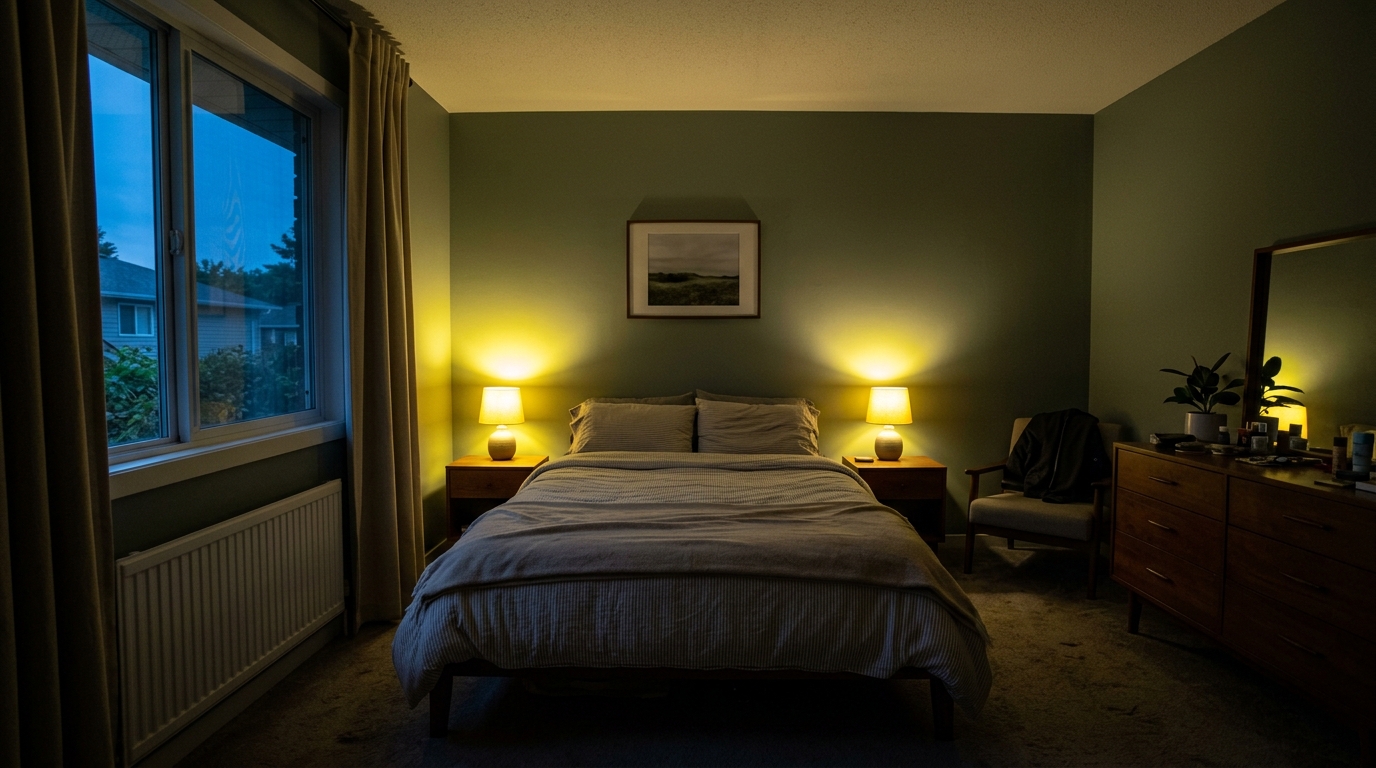
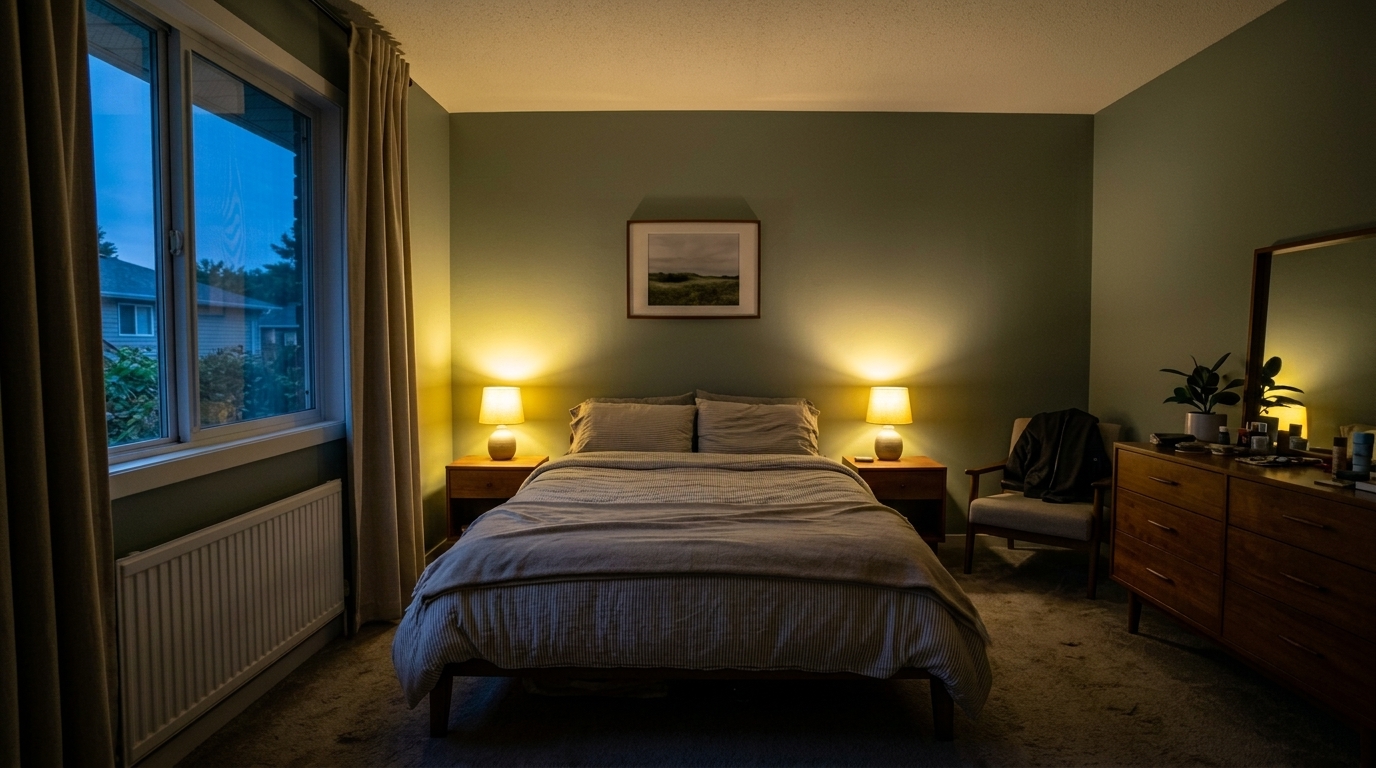
Twilight Bedroom Balance
Balance exposure in the same twilight bedroom balance.
Intelligent Exposure Correction Features
Advanced AI algorithms designed to handle complex lighting challenges in real estate photography.
01
Intelligent Highlight Recovery
Automatically restores lost details in blown-out windows and bright light fixtures without affecting the rest of the scene.
02
Shadow Detail Enhancement
Gently brightens dark corners, hallways, and shaded areas, revealing hidden architectural features without introducing digital noise.
03
Dynamic Range Compression
Evens out extreme contrast between bright outdoor views and indoor spaces, creating a smooth, natural transition of light.
04
Color and Tone Preservation
Adjusts brightness levels while keeping original paint colors, wood tones, and textures accurate and vibrant.
05
Automated Contrast Normalization
Analyzes the unique lighting of each room to apply custom exposure curves, avoiding a flat or artificial HDR look.
06
Localized Light Adjustments
Targets specific zones of uneven lighting, such as under-cabinet shadows or harsh spotlight reflections, for a balanced finish.
When to Use Exposure Balancing
Solve common lighting issues from high-contrast interiors to bright midday exterior shots.
High-Contrast Living Rooms
Perfect for living spaces with large windows where the outdoor view is too bright and the indoor furniture is too dark.
InteriorsMidday Exterior Property Shots
Balances harsh, direct sunlight and deep shadows cast by rooflines, trees, or neighboring structures.
ExteriorsBasements and Dark Hallways
Brightens enclosed spaces with limited natural light, making them feel open, airy, and inviting to buyers.
Dim SpacesCovered Patios and Porches
Corrects photos where the shaded seating area is dark but the sunny backyard background is completely washed out.
Outdoor LivingKitchens with Uneven Lighting
Smooths out harsh shadows under cabinets and bright hot spots on polished countertops or stainless steel appliances.
KitchensTwilight and Sunset Listings
Balances the glowing sky with interior lighting, ensuring both the home's warmth and the sunset view are captured.
TwilightHow to Balance Photo Exposure in Three Steps
Achieve perfectly balanced lighting across your interior and exterior shots instantly.
1
Upload Your High-Contrast Photo
Drag and drop your real estate image into the editor. Our tool supports standard formats like JPEG, PNG, and WebP, handling both interior and exterior shots.
2
Apply the Exposure Balancing Preset
Select the Exposure Balancing preset. The AI instantly analyzes the light distribution, identifying overexposed windows and underexposed shadow areas.
3
Save and Download Your Balanced Image
Preview the balanced, natural-looking result. Download your optimized, listing-ready photo in high resolution with all details perfectly visible.
Why Exposure Balancing Matters
Source-backed context for why exposure balancing edits matter inside image optimization workflows.
Photos useful: 83%
Exposure Balancing within Image Optimization evidence
Photos are one of the most valuable website features for home buyers; NAR's 2025 generational trends report says 83% of internet-using buyers rated photos as very useful. For Exposure Balancing pages, this supports showing how a focused Image Optimization edit can make the listing photo feel clearer, more polished, and easier for buyers to evaluate.
Source: NAR 2025Photo priority: 26%
Exposure Balancing within Image Optimization evidence
Zillow Research's 2025 prospective buyer report ranked high-resolution photos as the number two most important listing feature, selected by 26% of prospective buyers; floor plans ranked first at 33%. For Exposure Balancing pages, this supports showing how a focused Image Optimization edit can make the listing photo feel clearer, more polished, and easier for buyers to evaluate.
Source: Zillow 2025Sale signal: 3 weeks
Exposure Balancing within Image Optimization evidence
Redfin reported that professionally photographed homes in the $400,000 range sold three weeks faster and for more than $10,000 relative to list price compared with amateur photos. Use this as supporting context, not as a guaranteed result. For Exposure Balancing pages, this supports showing how a focused Image Optimization edit can make the listing photo feel clearer, more polished, and easier for buyers to evaluate.
Source: RedfinMastering Exposure Balancing in Real Estate Photography
Achieving the perfect balance between bright outdoor views and cozy indoor spaces is one of the biggest challenges in property marketing. Learn how to use AI exposure balancing to create professional, inviting listing photos.
The Challenge of High Dynamic Range in Real Estate
Cameras struggle to capture what the human eye sees naturally. When photographing an interior, shooting for a bright room often results in completely white, blown-out windows. Conversely, exposing for the window view leaves the interior dark and uninviting. AI exposure balancing solves this by analyzing the image in zones, applying targeted adjustments to highlights and shadows simultaneously to mimic natural human vision.
Workflow Integration: When to Apply Exposure Balancing
For the best results, apply the Exposure Balancing preset as one of your first editing steps. Correcting the light distribution early ensures that subsequent edits—such as color correction, sharpening, or virtual staging—are applied to an evenly lit canvas. This prevents color distortion in shadow areas and keeps your final listing photos looking cohesive across your entire gallery.
Choosing Your Tool: Exposure Balancing vs. Sibling Presets
When deciding on your editing workflow, consider the specific needs of your photo. Use the Exposure Balancing preset when your image has good composition and color but suffers from harsh contrast, dark corners, or bright windows. If your photo also has crooked walls or lens distortion, choose the Full Correction Suite or Real Estate Photo Editing preset. For quick, everyday mobile uploads, the MLS Photo Enhancement preset is your best fit, while Glare and Reflection Reduction should be reserved for scenes with distracting reflections on polished floors or glass.
When to Avoid This Preset and Key Tradeoffs
While exposure balancing is highly versatile, it is not a cure-all for extremely low-quality images. If a photo is severely blurry, out of focus, or completely pitch black with no digital information in the shadows, attempting to balance the exposure will only introduce noise and artifacts. In these cases, it is best to reshoot the space with better ambient lighting or use a tripod to capture a cleaner source image.
Explore Image Optimization Presets
Choose the perfect preset to refine exposure, correct colors, and polish your property listings.
Full Correction Suite
All-in-one correction for brighter, cleaner, listing-ready real estate photos.
Open This Generator →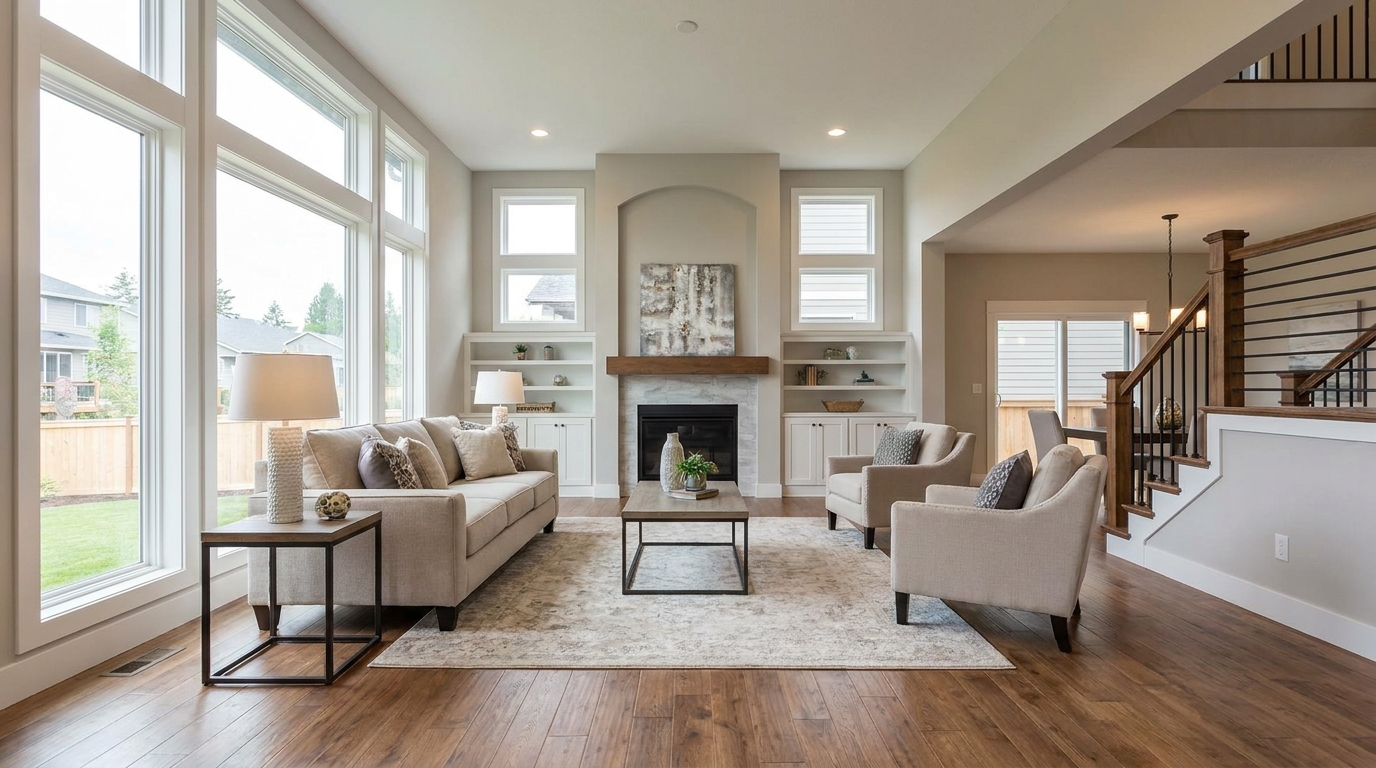
Real Estate Photo Editing
Everyday listing polish with balanced light, true color, and crisp natural detail.
Open This Generator →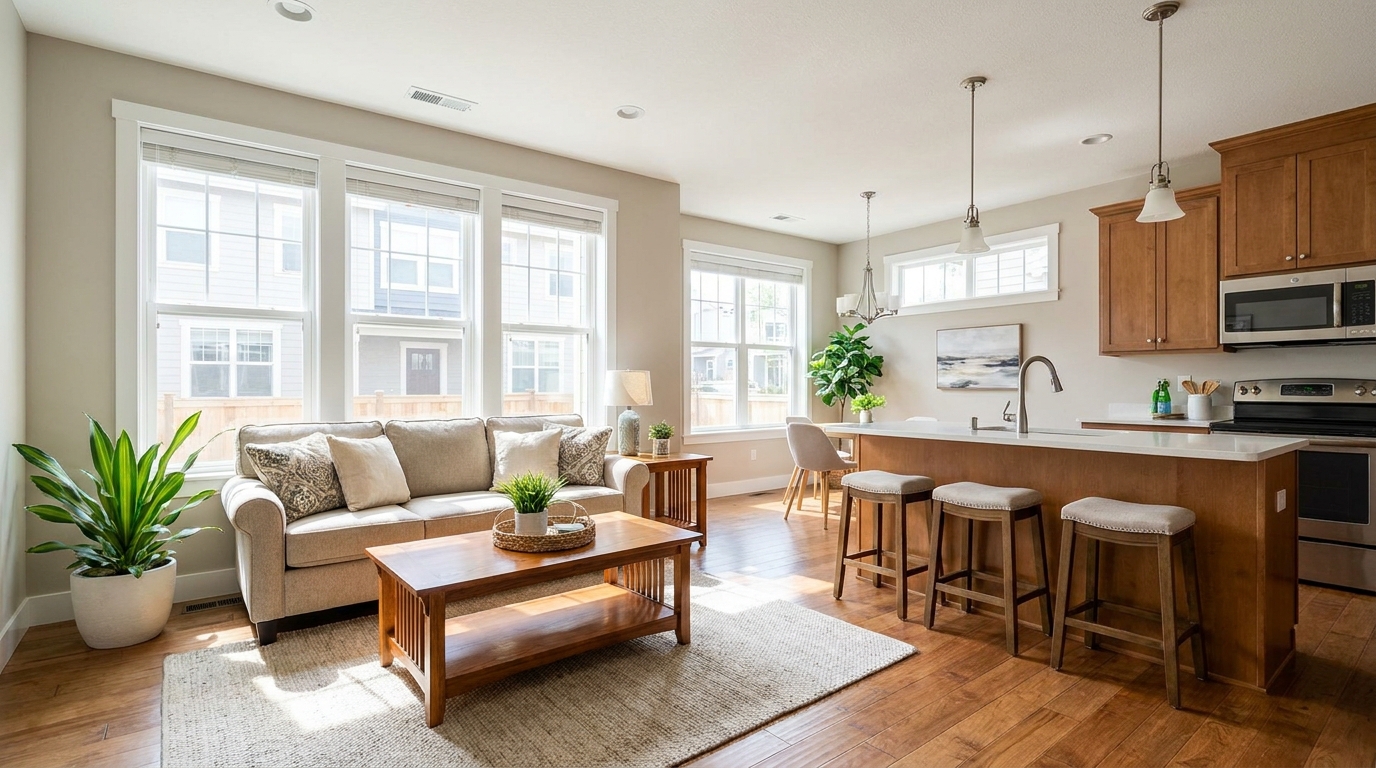
MLS Photo Enhancement
Clean MLS-ready enhancement that makes property photos brighter, sharper, and more consistent.
Open This Generator →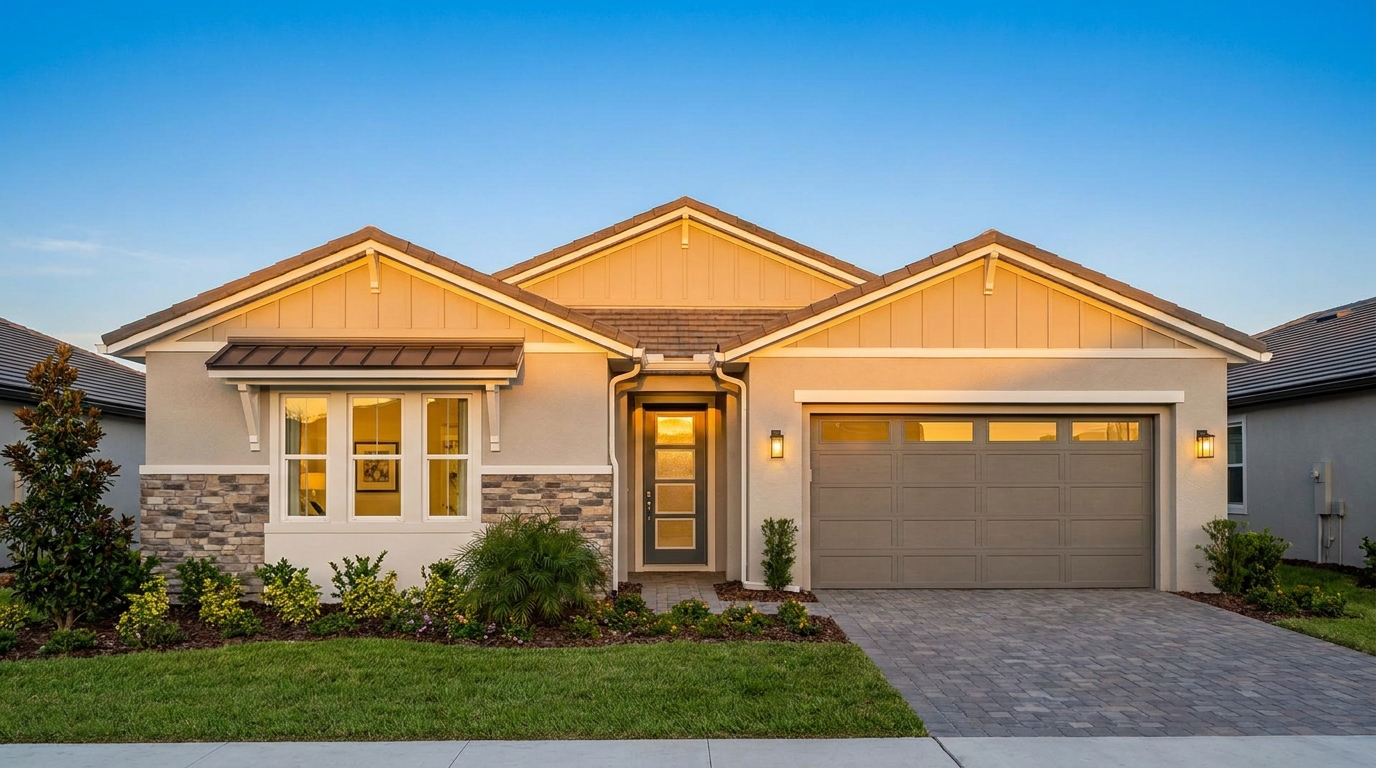
Single Exposure Editing
Smart single-exposure editing that recovers detail and delivers a naturally polished result.
Open This Generator →
Social Media Photo Optimization
Scroll-stopping optimization for social-ready property photos with bright, clean visual appeal.
Open This Generator →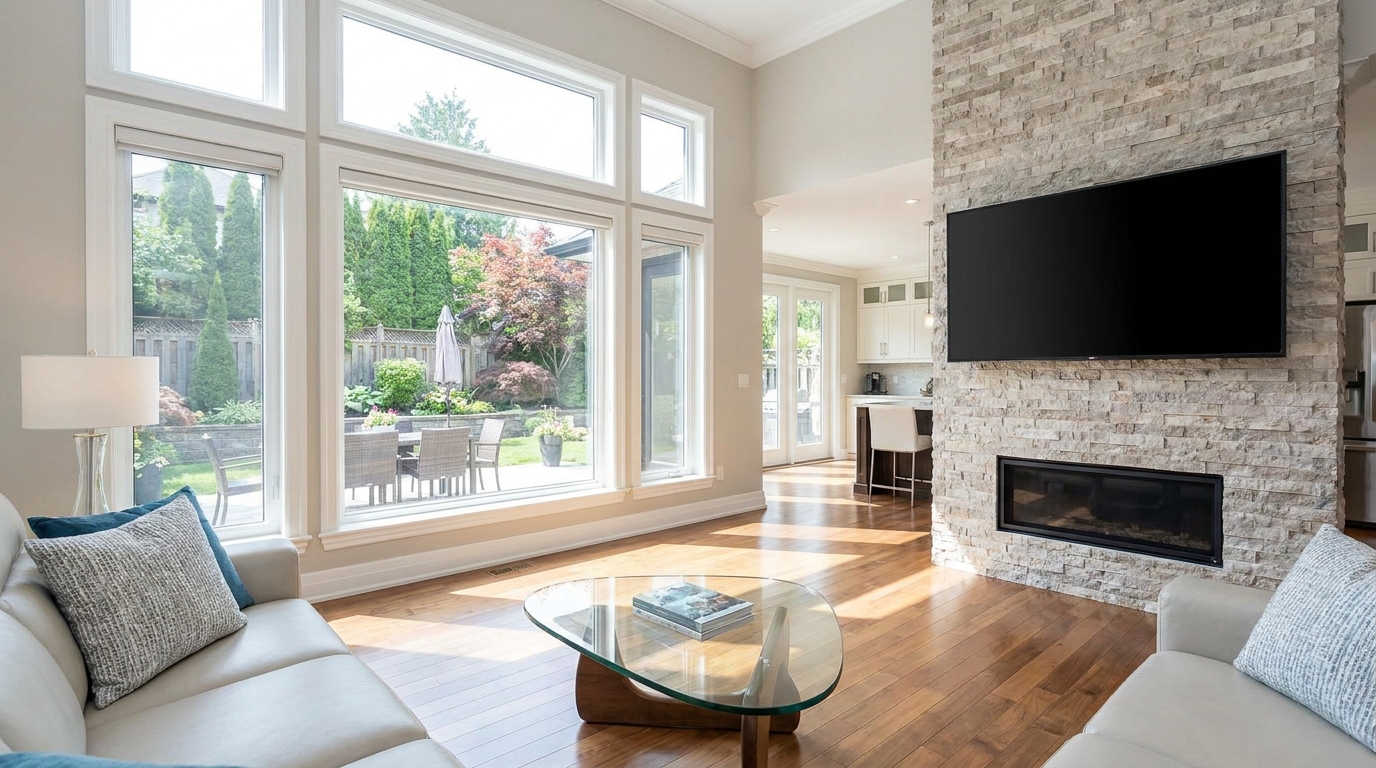
Glare and Reflection Reduction
Minimize harsh reflections and distracting glare for a clearer, more premium presentation.
Open This Generator →Frequently Asked Questions
Exposure balancing is the process of adjusting the brightest and darkest parts of an image so that everything is clearly visible. In real estate, this typically means brightening dark indoor corners while recovering details in bright, sunlit windows.
Our AI analyzes the overexposed window areas and recovers highlight details, pulling in the outdoor view if the data is present, while keeping the interior room bright and natural.
No. Unlike aggressive HDR filters that create unnatural halos and flat contrast, our Exposure Balancing preset uses intelligent localized adjustments to maintain realistic depth, shadows, and textures.
Yes. The AI is highly effective at optimizing single-exposure photos taken on mobile phones, instantly elevating them to a more professional, balanced standard.
While the Full Correction Suite handles perspective alignment, noise reduction, and color correction all at once, the Exposure Balancing preset focuses specifically on correcting uneven lighting and high contrast.
No. This preset is designed to extract the maximum dynamic range from a single exposure, saving you the time and equipment needed for bracketed shooting.
Discover More Photo Enhancement Tools
Explore additional AI presets to elevate your real estate marketing and property presentation.
Image to Video
AI image-to-video generation for turning home, room, and property photos into more vivid presentation videos.
Exterior Renovator
AI exterior renovation for visualizing facade updates, curb appeal improvements, and home exterior remodel ideas.
Landscaping
AI landscaping design for exploring outdoor concepts, curb appeal upgrades, planting ideas, and yard layout directions.
Virtual Staging
AI virtual staging for furnishing empty rooms and creating listing-ready interiors for real estate marketing.
AI Image Generator
Free AI image generation for turning text prompts into unlimited visual ideas for home design, interiors, landscaping, renovation
Object Remover
AI object removal for cleaning up distracting items from room, home, and property photos.
Bring Perfect Balance to Your Property Photos
Stop losing listing-ready photos to bad lighting. Try our AI Exposure Balancing tool today and instantly reveal hidden details in every room.
Ideal.House is more than a platform—it's your all-in-one home design ecosystem. Dive into powerful AI tools such as Interior Remodel, Exterior Renovator, and Landscaping to craft stunning spaces, and let HouseGPT guide you with tailored suggestions for planning, styling, and furnishing. Connect with a passionate community to swap ideas and advice, then take your designs from concept to completion with handpicked products matched to your taste.
At Ideal.House, we've built a space where technology, creativity, and collaboration come together to redefine home design.
At Ideal.House, we've built a space where technology, creativity, and collaboration come together to redefine home design.
Technical support [email protected]


'%3e%3cpath%20d='M162.5%20200H37.5C16.6667%20200%200%20183.333%200%20162.5V37.5C0%2016.6667%2016.6667%200%2037.5%200H162.5C183.333%200%20200%2016.6667%20200%2037.5V162.5C200%20183.333%20183.333%20200%20162.5%20200ZM37.5%208.33333C21.6667%208.33333%208.33333%2021.6667%208.33333%2037.5V162.5C8.33333%20178.333%2021.6667%20191.667%2037.5%20191.667H162.5C178.333%20191.667%20191.667%20178.333%20191.667%20162.5V37.5C191.667%2021.6667%20178.333%208.33333%20162.5%208.33333H37.5Z'%20fill='black'/%3e%3cpath%20d='M54.4224%2040C52.5284%2040%2050.653%2040.3737%2048.9032%2041.0997C47.1534%2041.8257%2045.5635%2042.8899%2044.2242%2044.2314C42.885%2045.573%2041.8226%2047.1656%2041.0978%2048.9184C40.373%2050.6712%2040%2052.5498%2040%2054.447C40%2056.3442%2040.373%2058.2229%2041.0978%2059.9756C41.8226%2061.7284%2042.885%2063.3211%2044.2242%2064.6626C45.5635%2066.0041%2047.1534%2067.0683%2048.9032%2067.7943C50.653%2068.5203%2052.5284%2068.894%2054.4224%2068.894C56.3164%2068.894%2058.1918%2068.5203%2059.9416%2067.7943C61.6914%2067.0683%2063.2813%2066.0041%2064.6206%2064.6626C65.9598%2063.3211%2067.0222%2061.7284%2067.747%2059.9756C68.4718%2058.2229%2068.8448%2056.3442%2068.8448%2054.447C68.8448%2052.5498%2068.4718%2050.6712%2067.747%2048.9184C67.0222%2047.1656%2065.9598%2045.573%2064.6206%2044.2314C63.2813%2042.8899%2061.6914%2041.8257%2059.9416%2041.0997C58.1918%2040.3737%2056.3164%2040%2054.4224%2040ZM82.4631%2079.8415V159.993H107.307V120.357C107.307%20109.898%20109.271%2099.7689%20122.217%2099.7689C134.985%2099.7689%20135.143%20111.727%20135.143%20121.017V160H160V116.045C160%2094.4536%20155.36%2077.8607%20130.166%2077.8607C118.071%2077.8607%20109.963%2084.5097%20106.648%2090.8022H106.311V79.8415H82.4631ZM41.9775%2079.8415H66.8608V159.993H41.9775V79.8415Z'%20fill='black'/%3e%3c/g%3e%3cdefs%3e%3cclipPath%20id='clip0_1255_15'%3e%3crect%20width='200'%20height='200'%20fill='white'/%3e%3c/clipPath%3e%3c/defs%3e%3c/svg%3e)

💰 Earn 10% commission as a Ideal House Affiliate Partner.
Join us