1/6
How to Clean a Dryer Vent in 7 Simple Steps
Maintaining a clean dryer vent is crucial for efficient appliance operation and, more importantly, for preventing potential fire hazards in the home. Lint and debris accumulate in exhaust pipes over time, reducing efficiency and posing a significant fire risk. Dirty dryer vents are a leading cause of domestic dryer fires, according to the US Fire Administration. Therefore, cleaning the dryer vent annually is recommended. This essential household chore can often be a do-it-yourself task, especially for straightforward setups, and does not require extensive time or specialized skills.
Several indicators suggest that a dryer vent requires cleaning. These include clothes taking longer than usual to dry or having a moldy odor, the dryer unit becoming excessively hot to the touch, or emitting a burning smell during operation. Increased humidity in the laundry room or restricted airflow when the dryer is running also point to a clogged vent, as hot air may be trapped indoors. An unusually large amount of lint in the filter, even after using wool dryer balls, is another clear sign. Additionally, certain types of dryer ducts, such as foil, plastic, or vinyl, are more prone to clogging and fire risks, ideally requiring replacement with rigid metal ducts or more frequent cleaning.
For those undertaking a DIY cleaning, a few considerations are important. While some experts advise against DIY for gas dryers due to safety concerns, and complex ductwork (like vertical runs in basements) might necessitate professional help, many homeowners can manage the task. A drill-powered duct cleaning brush, which can extend up to 40 feet, is a valuable tool for this. The cleaning process typically involves seven steps:
1. **Gathering supplies:** Beyond standard cleaning products, essential tools include a Shop-Vac (or cordless vacuum with hose attachment), electrical or duct tape, a broom and dustpan, a dryer duct cleaning kit, a power drill, and an optional respirator face mask.
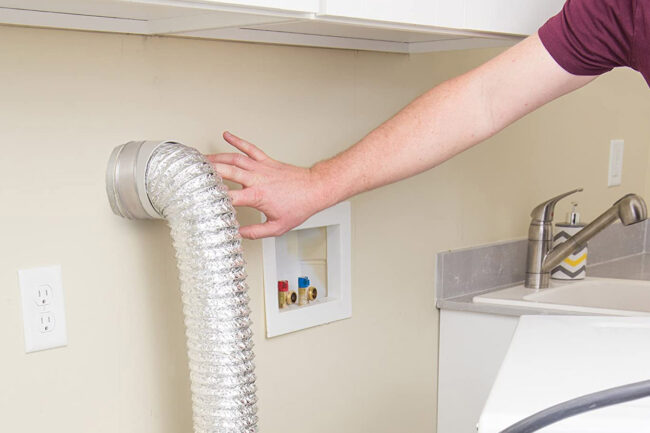
2. **Disconnecting the duct:** The dryer should be unplugged, and for gas dryers, the gas valve turned off. Pull the dryer away from the wall and carefully disconnect the duct from the machine, removing any zip ties.
3. **Vacuuming the vent entrance:** To contain the mess, lay down a plastic tarp or craft paper. Using a vacuum with a hose attachment, thoroughly clean around and inside the dryer exhaust duct entrance. A vacuum with a HEPA filter is recommended to prevent lint inhalation.
4. **Connecting the rods:** For lint trapped deep inside, a dryer duct cleaning kit with flexible, connectable rods is effective. The rotating brush attachment goes first, followed by connecting a power drill to the rod. Electrical tape can secure rod connections.
5. **Operating the drill:** The drill should be turned on medium power and rotated clockwise to avoid disassembling attachments inside the duct. Slowly move the rods and brush back and forth, then pull them out.
6. **Cleaning the interior mess:** After cleaning the duct, use a handheld vacuum to clear any remaining debris. If residue persists, clean with soapy water. Reconnect the duct, plug in the dryer, and turn the gas valve back on if applicable.
7. **Inspecting the exterior vent:** The exterior vent, located on the house's outer wall, also needs inspection. If it’s in an inaccessible location or near a roof, hiring a professional is advised for safety. Ensure no birds are nesting inside. The cleaning method for the exterior vent is similar, using flexible rods or a leaf blower. To prevent lint from scattering, pantyhose can be secured over the exterior opening to catch debris.
While annual cleaning is the general recommendation, households with pets, large families, or high laundry volumes may need more frequent cleaning, potentially twice a year. The distance of the vent from the dryer also influences cleaning frequency, with longer distances requiring more attention due to increased lint buildup. Incorporating this task into spring and fall cleaning routines can be beneficial. Crucially, removing lint from the lint trap after every load of laundry is the most effective way to keep the dryer vent clean, improve drying efficiency, and reduce fire risks. Additionally, avoiding unattended dryer operation and ensuring adequate space around the dryer to prevent clutter are vital safety measures.
#DryerVentCleaning #HomeMaintenance #FireSafety #LaundryRoom #DIYHomeCare #ApplianceMaintenance #HouseholdTips #DryerVentCleaning #HomeMaintenance #FireSafety #LaundryRoom #DIYHomeCare #ApplianceMaintenance #HouseholdTips
0 comment in total
 No comments yet
You may also like
How to clean vent covers and how often to do it - TODAY


Yes, You Can Dry-Clean at Home: And These 5 Furnishings and Decor Pieces Need TLC
Cleaning fans explain 'brilliant' way to banish mould from window frames

How to Clean a Ceiling Fan, From the Blades to the Motor

Have you forgotten about cleaning your oven extractor fan vent? This viral hack may be key to banishing years of grease

How to clean your HVAC system – 6 expert tips to make this essential task DIY-friendly

Tapping into a dryer vent for heating

CLEAN YOUR KITCHEN VENTS DAY - June 17, 2026


I use a laundry item to clean my fan - it works so much better than a cloth, and the coating repels dust for weeks

How to Clean Your Range Hood and Vent in 4 Easy Steps


This 29p hack to clear window condensation is genius

Will a Ventless Washer/Dryer Combo Work for You?

How to Clean Your Air Vents


Experts explain how to install a basement extractor fan to remove damp and musty smells for good
I Just Discovered a Smart Trick for Keeping Ceiling Fans Clean (It’s So Easy!)
Bathroom Fan Venting Code Basics

The Best Dryer Vent Hoses for Tight Spaces

Clever $4 hack makes cleaning your ceiling fans incredibly easy

This simple trick will clean ceiling fans without a mess

Vinegar + vacuum = cleaning magic for household appliances