1/2
Look Out Below! (Published 2015)
This blog post details the author's challenging and ultimately mixed experience with two home improvement projects: installing tin ceiling panels and crown molding. The author initially planned to install 100 feet of crown molding and 200 square feet of tin panels, seeking advice from various design and retail experts. The tin ceiling installation, intended for a sun porch with an existing beadboard cathedral ceiling, proved to be a significant failure. The author chose low-cost white tin tiles and attempted to install them by nailing them directly to the wood, following advice to start from the center. However, the tiles quickly ceased to align properly, leading to a visibly messy and misaligned result. Despite the initial intention to forgo complex border patterns due to existing chunky molding, the high ridges of the misaligned tiles did not sit well under the molding. Expert consultation revealed the critical error of not starting the installation precisely at the center of the ceiling and failing to sketch a grid beforehand, a step recommended by an expert from Armstrong Ceilings and a designer. Given the unsatisfactory outcome and lack of aesthetic appeal, the author decided to return the unused tin tiles and abandon the project.
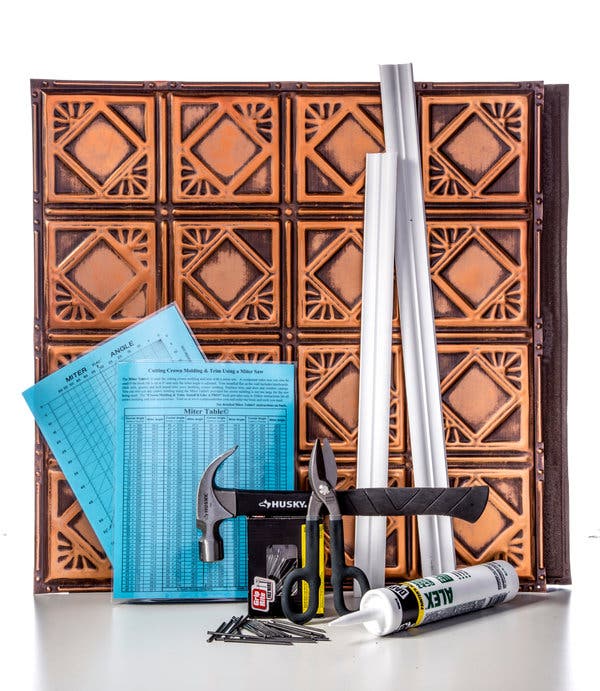
The crown molding installation, while less disastrous, still presented considerable difficulties. The author notes that while ornate crown molding can be expensive, simpler patterns and materials are more affordable. An expert suggests that four-inch wide molding is suitable for eight-foot ceilings but emphasizes the trickiness of installation due to the common issue of non-straight walls, especially in older homes. The author further cautions that even in newer homes with seemingly straight walls, hiring a professional carpenter might be preferable. The primary challenge lies in ensuring the molding lies flat on all surfaces and that all corners are perfectly mitered. Essential tools for this task include a compound miter saw, which the author purchased with a laser-cutting guide. The author also found a specialized book, “Crown Molding and Trim: Install It Like a Pro!” by Wayne Drake, and a set of templates and gauges to be valuable resources. The author's father assisted with the installation, and despite using specialized tools and receiving direct advice from the book's author, they ruined several pieces of inexpensive particle board molding. They successfully completed the installation in a small bathroom, adding spackling paste and touch-up paint for a neat finish. The experience, while challenging, provided the author with the knowledge to potentially tackle a larger project on the first floor in the future.
#HomeImprovement #DIY #InteriorDesign #CrownMolding #TinCeilings #HomeRenovation #ConstructionTips #HomeImprovement #DIY #InteriorDesign #CrownMolding #TinCeilings #HomeRenovation #ConstructionTips
 No comments yet
Come look at us now.