1/5
How do I install Java on Windows?
Installing Java on Windows requires obtaining a copy of the Java Development Toolkit (JDK) installation media, which includes a Java Runtime Environment (JRE) and a Java Virtual Machine (JVM). This is essential for running Java applications and games. The JDK also provides programming tools such as a compiler and a Java web server, which are crucial for developers. Before proceeding with the installation, certain prerequisites must be met. These include using an updated Windows 10 or Windows 11 operating system, having internet access to download the JDK, possessing sufficient administrative rights for installation, and ensuring at least 500 MB of hard drive space is available for both download and installation.
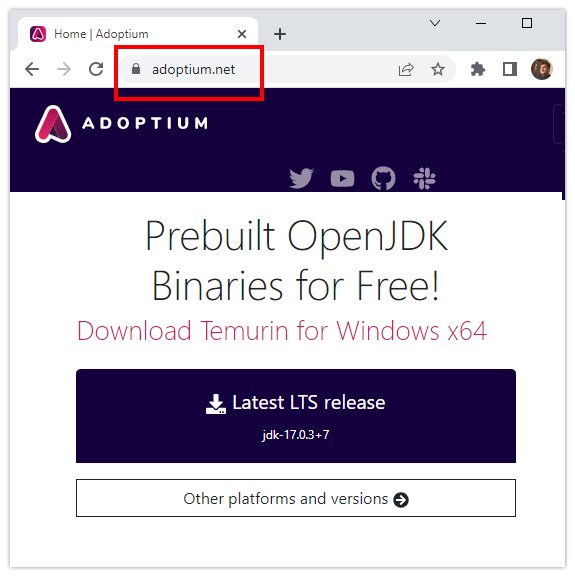
Several companies offer Java installers, including Oracle, Azul, Amazon, and Microsoft, all of which are based on the open-source OpenJDK project. For first-time users installing Java on Windows, Eclipse’s Adoptium project, formerly AdoptOpenJDK, is recommended due to its permissive open-source license and ease of installation. The installation process involves five key steps: downloading Java for Windows, running the Java installer, validating the JAVA_HOME setting, confirming the Java PATH variable, and executing a JDK command to verify the installation's success.
The latest recommended Java release, Java 17 at the time of writing, can be downloaded directly from the Eclipse Adoptium homepage. This download is typically packaged as an .msi file. When running the Windows Java installer, users have options to customize the installation, such as choosing the installation directory, adding Java to the Windows PATH, allowing Java to automatically run JAR files, setting the JAVA_HOME environment variable, and configuring JavaSoft registration keys. It is advisable to change the default installation directory from "C:\Program Files" to a custom folder without spaces, like "C:\tools\jdk17", to avoid potential errors in scripts.
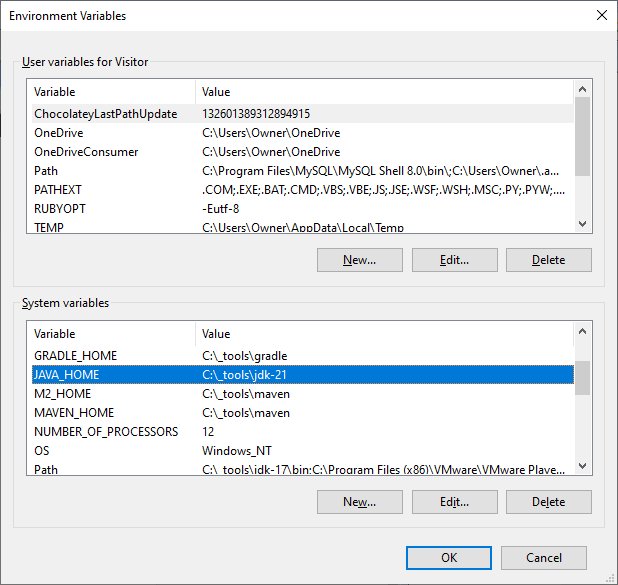
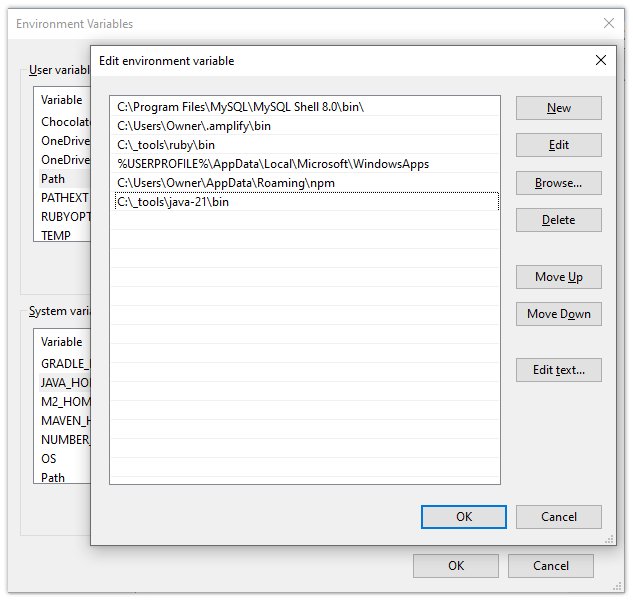
Configuring the Java PATH environment variable allows JDK utilities, such as the Java compiler and Java Shell, to be invoked by name in a DOS prompt or PowerShell, significantly simplifying development tasks. Similarly, setting the JAVA_HOME environment variable is crucial as many Java-based programs, like Minecraft or Tomcat, query this variable to locate the Java installation. The installer is recommended to configure both the Java PATH and JAVA_HOME automatically. If manual configuration is necessary, separate tutorials are available for setting JAVA_HOME and the Java PATH.
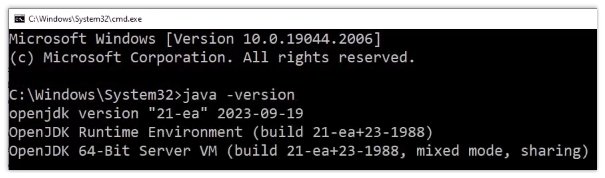
After the installation, it is important to validate the JAVA_HOME and Java PATH settings. This can be done using PowerShell or the Windows Command Prompt by echoing the respective environment variables. For JAVA_HOME, the output should display the root folder where Java was installed. For the Java PATH, the output should include the full path to the `bin` folder of the JDK installation. The final verification step involves running a Java command, such as `java -version`, to confirm that Java is correctly installed and functioning, which will display the installed Java version and runtime environment details.
#JavaInstallation #WindowsOS #JDK #JRE #JVM #JAVA_HOME #EnvironmentVariables #SoftwareDevelopment #OpenJDK #JavaInstallation #WindowsOS #JDK #JRE #JVM #JAVA_HOME #EnvironmentVariables #SoftwareDevelopment #OpenJDK
 Ainda não há comentários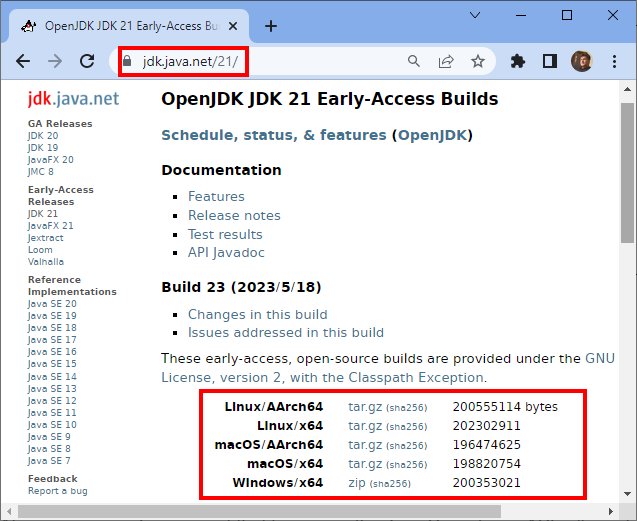
How to download and install Java 21 on Windows
Install Maven on Windows